Prerequisites
- Account on Go High Level is necessary.
- Contact Form 7 should be installed and activated.
- Go High Level Extension for Contact Form 7 should be installed and activated.
- To send Contact Form 7 data to Go High Level, the form must have the name, email, and phone type same as the Mapping Fields set inside the GHL Extension for Contact Form 7 plugin.
User’s Guide
Step – 1: First, install and activate the plugin. Refer to the installation guide for assistance.

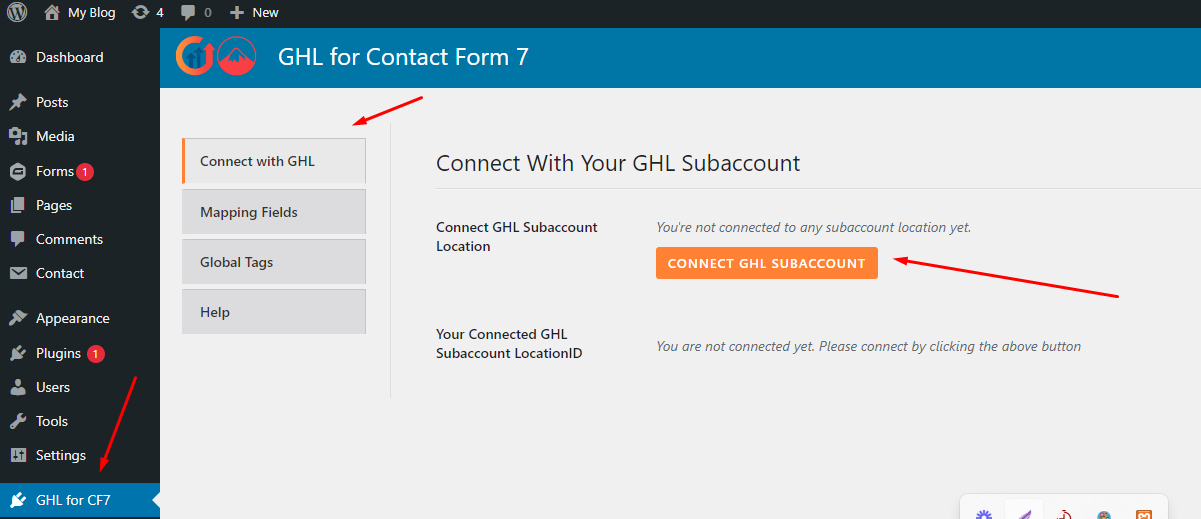
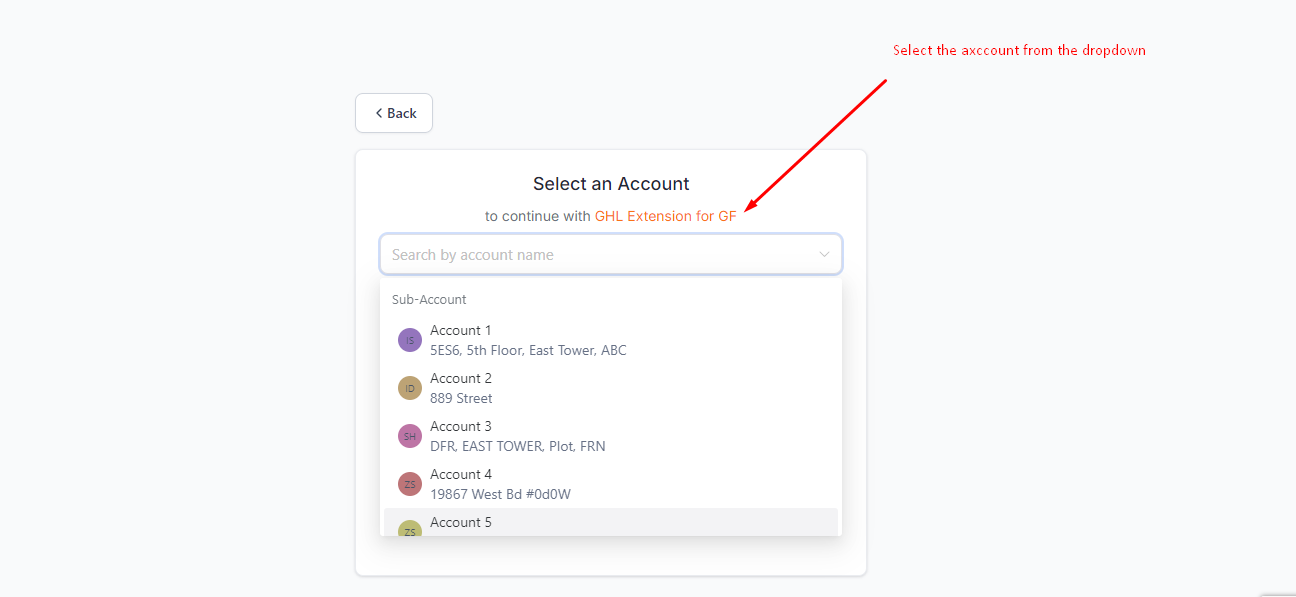
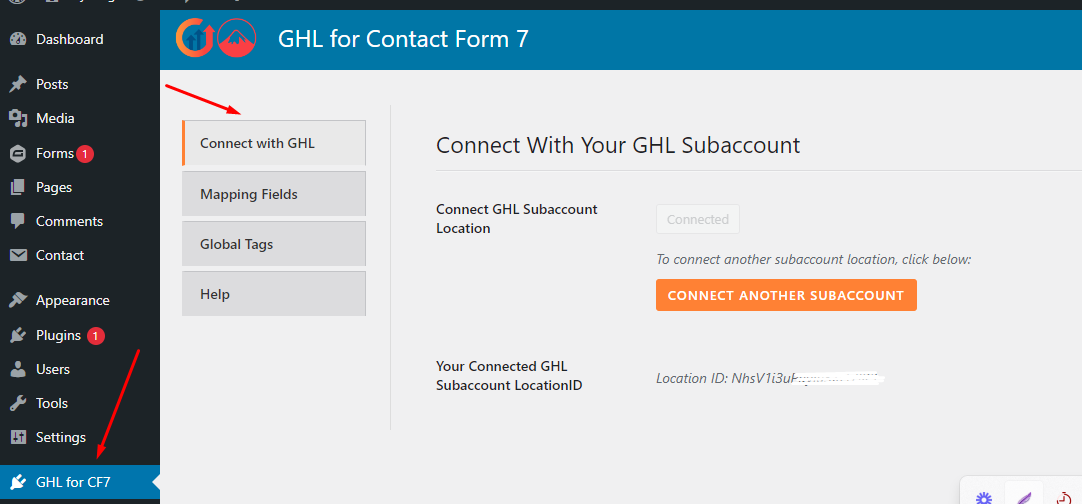
Step – 2: Go to the Plugin’s Settings > Connect With GHL tab. Connect your GHL Business account location by clicking the Connect Your Location button and choosing your business account from the dropdown list. After that, you will be redirect to the same page, and your selected GHL SubAccount will be connected.

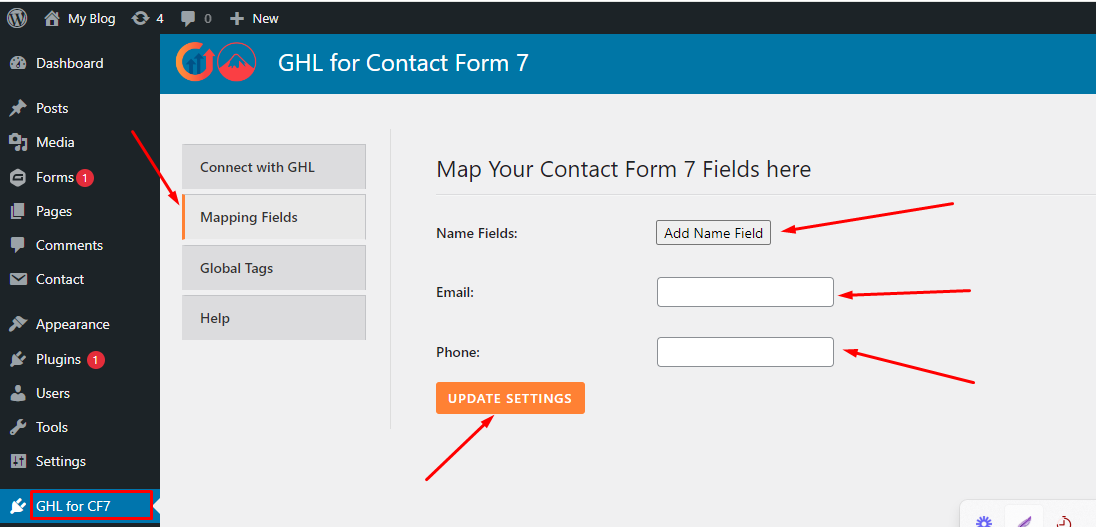
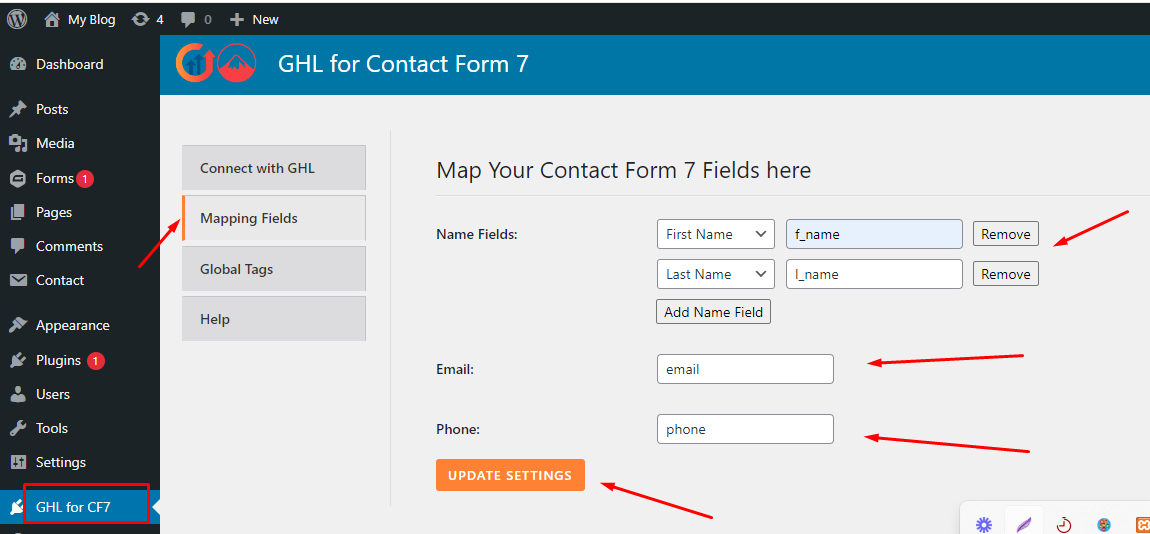
Step – 3: Now, go to the Mapping Fields tab and map the contact form fields(i.e. Name, Email and Phone). For the Name fields, when you click the Add Name Field button, you will see several Name Field types that you can set according to your requirements. After that, click the Update Settings button.
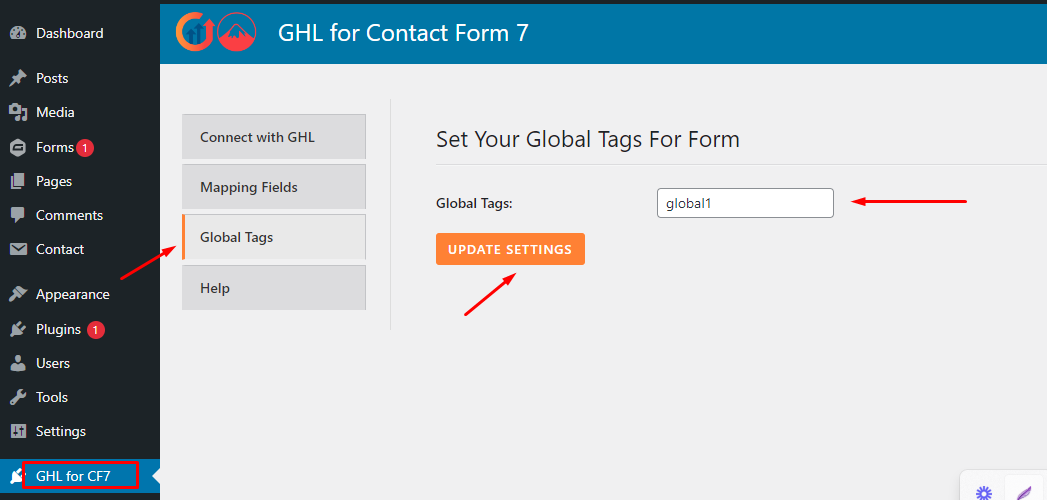
Step – 4: You can also set the Global Tags from the Global Tags tab. To do this, enter the global tags and click the Update Settings button. These tags will be used when there are no form-specific tags available.
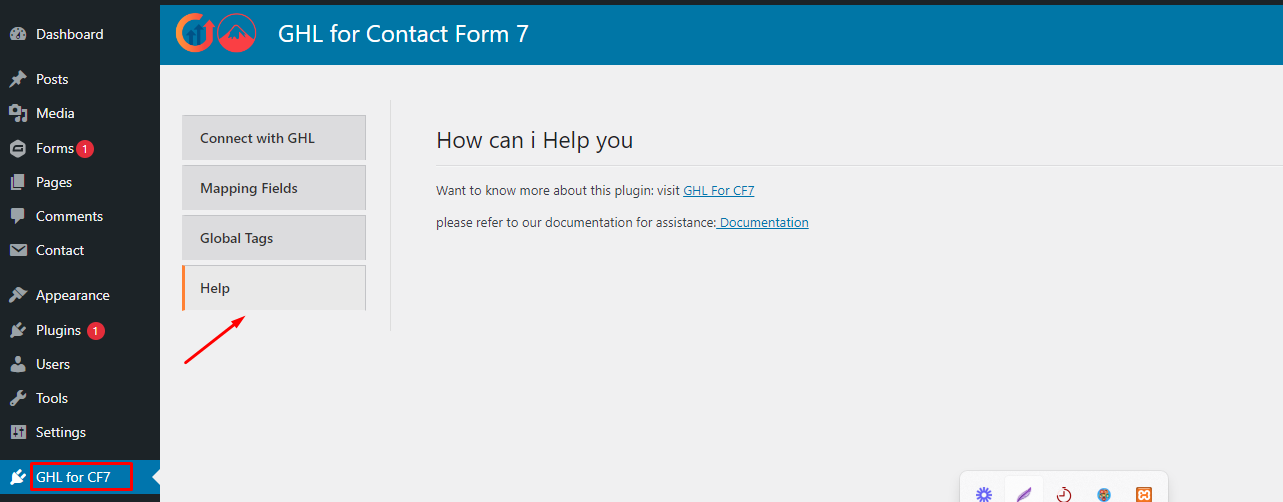
Step – 5: If you encounter any difficulties configuring the settings, you can visit the Help section or refer to the documentation.
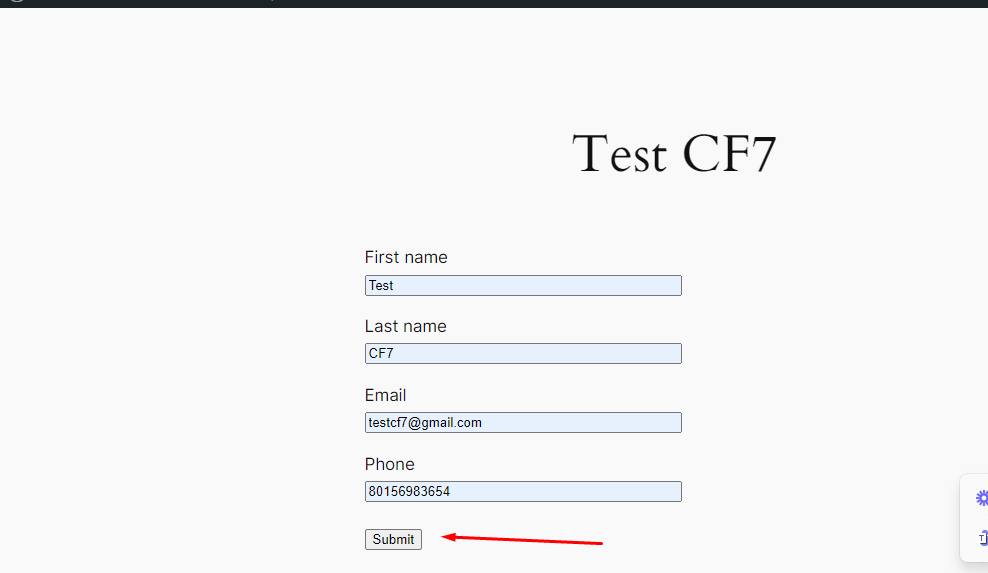
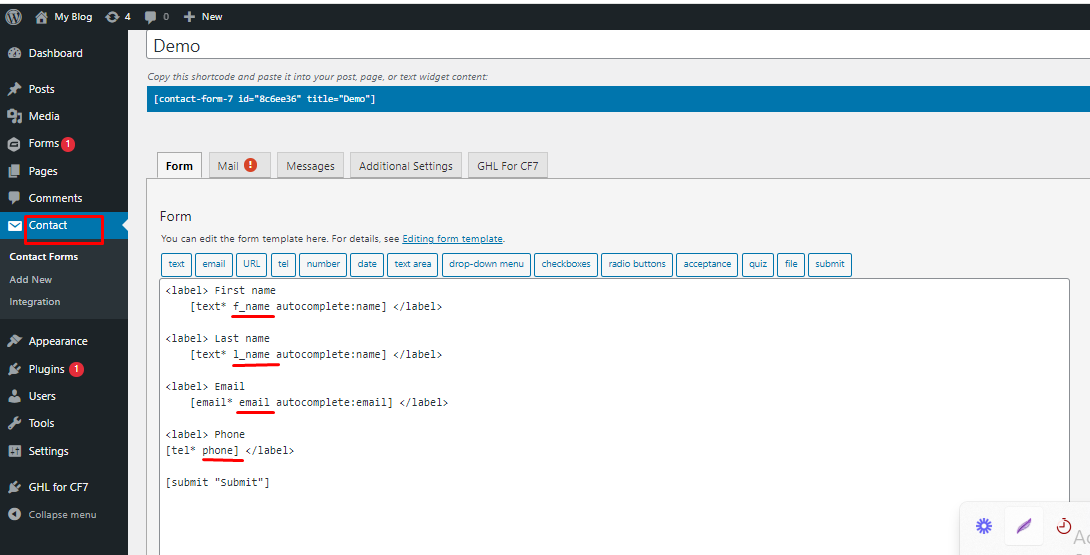
Step – 6: Now, create contact form fields that match the fields you set in the Mapping Fields section inside the plugin settings.
Note: After that configure the Mail setting of the forms.
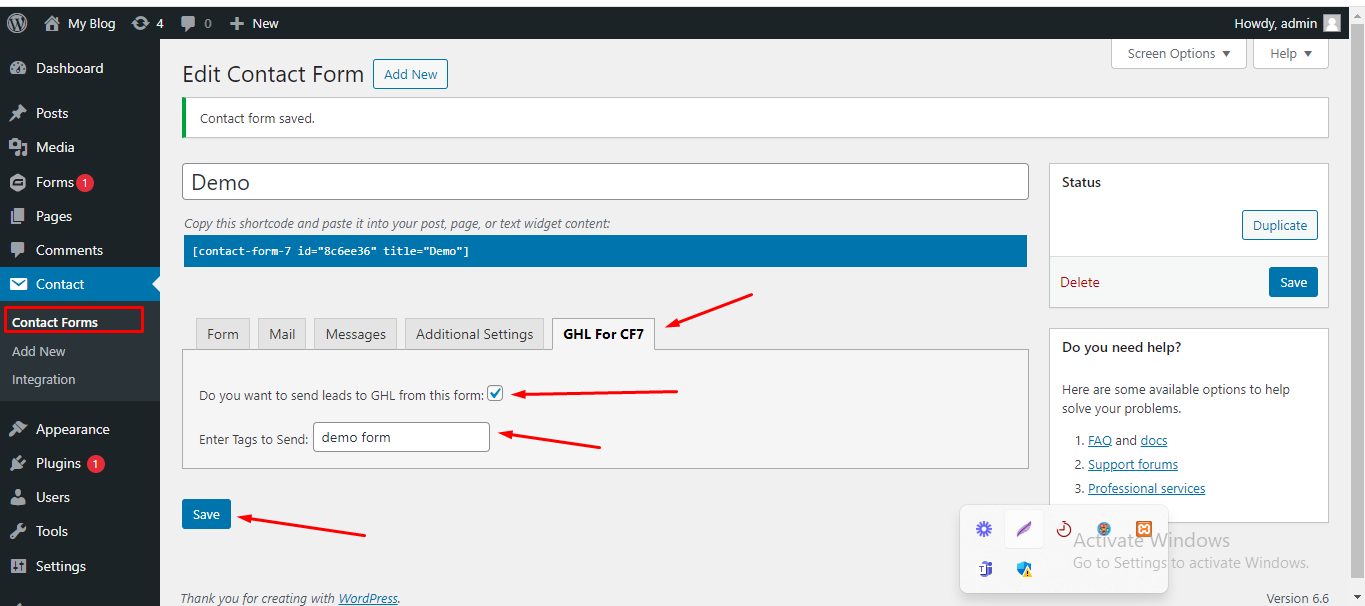
Step – 7: If you want to send form-specific tags, you can easily do so from the GHL For CF7 tab within the specific form settings.
Note: To send leads from that specific form to GHL CRM, you need to select the checkbox.
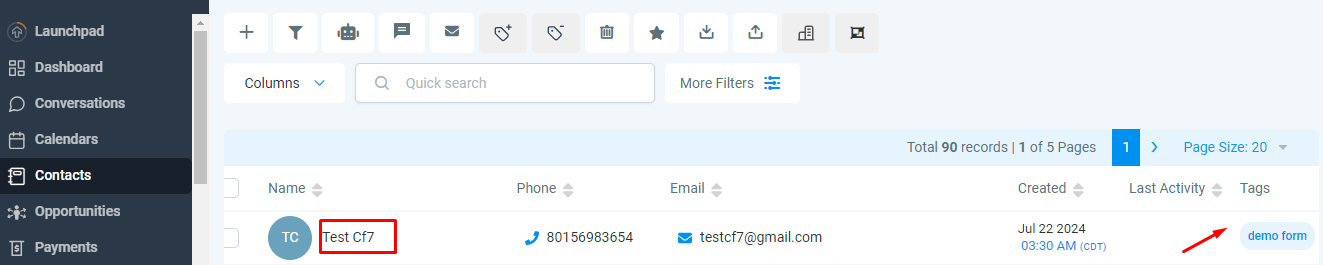
Step – 8: Now you are ready to submit the form and send its data to GHL CRM.