Prerequisites
- Ensure you have an active Go High Level account.
- Jotform Online Form latest plugin must be installed and activated.
- Form Integration for Go High Level and Jotform plugin must be installed and activated.
- Note: The form must have an email or phone field mapped to the corresponding GHL field to send leads on GHL CRM.
User Guide:
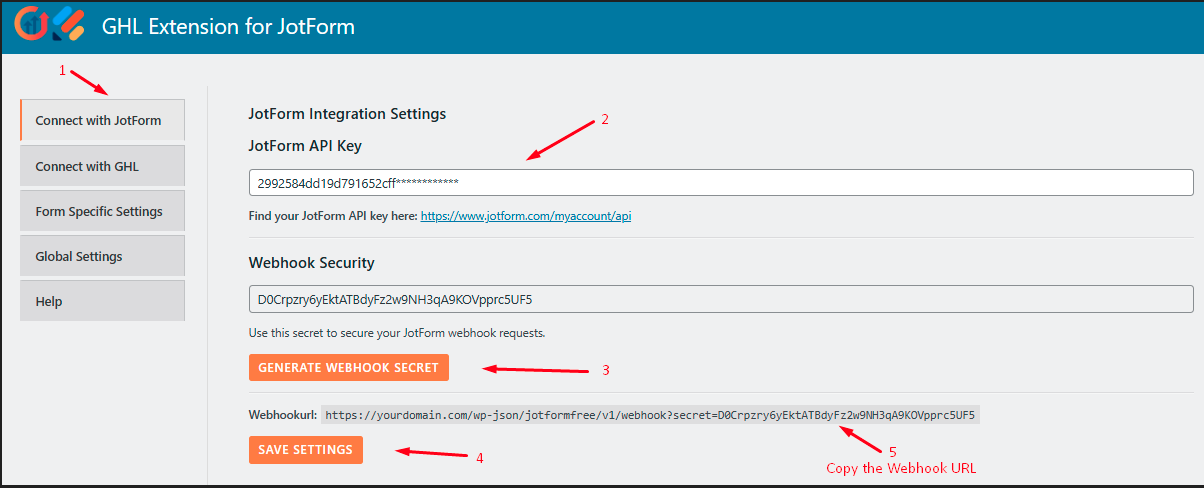
Step-1: To connect your JotForm account with your WordPress site, first add your JotForm API key in the “Connect with JotForm” tab of the plugin. You can find your JotForm API key at the following URL: https://www.jotform.com/myaccount/api
After that, generate the Webhook Secret by clicking the button. This webhook URL will be required when configuring the form specific settings, which are explained below.
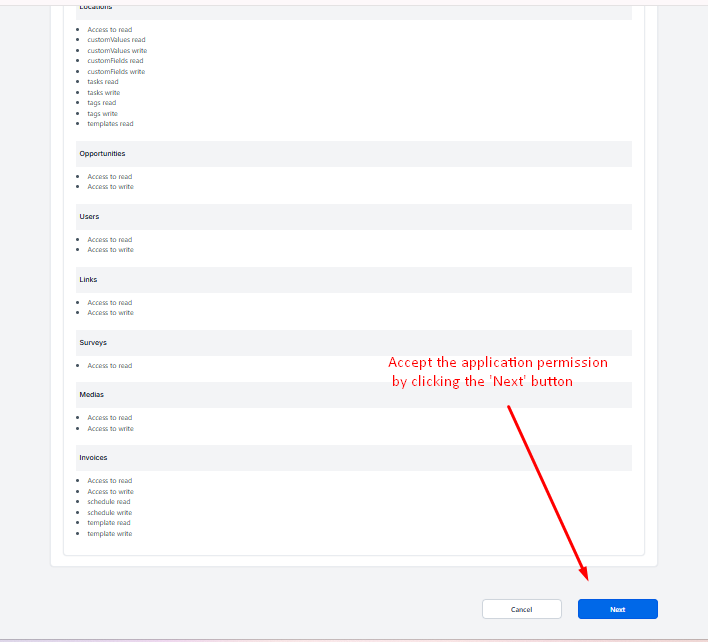
Step-2: Go to the "Connect With GHL" tab. Connect your GHL business account location by clicking the Connect Your Location button and selecting your business account from the dropdown list. To connect multiple business accounts, repeat this process for each account. 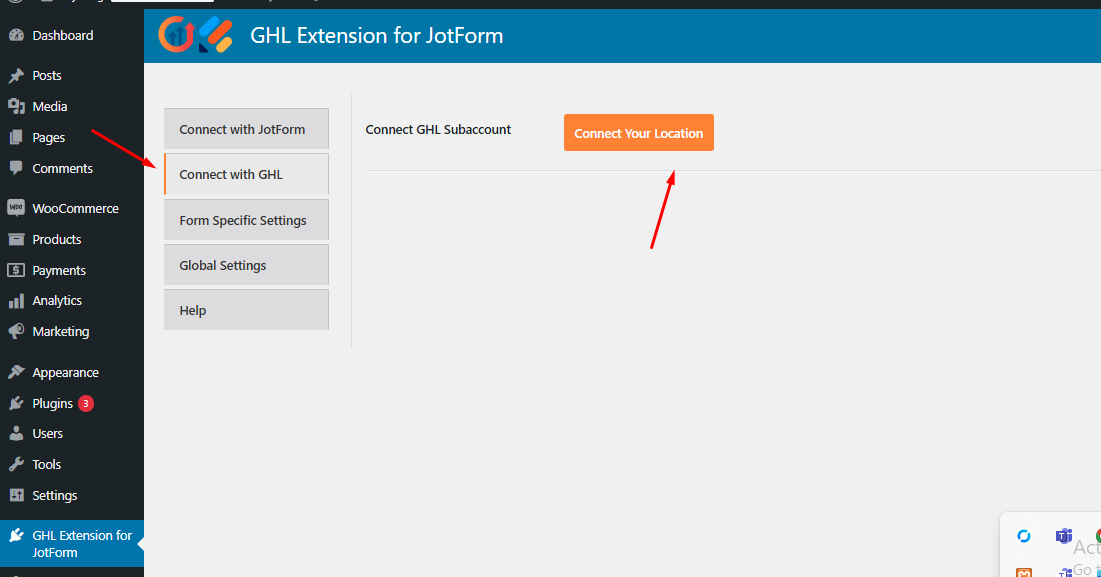

Form Specific Settings:
Note: To send JotForm data to GHL after a form submission, you need to set the webhook URL in the specific form whose data you want to send to GHL.
Here I guide you on how to do that:
Step-a: Go to the JotForm dashboard > Select the specific form > Edit Form > Integrations > Search for 'Webhooks'.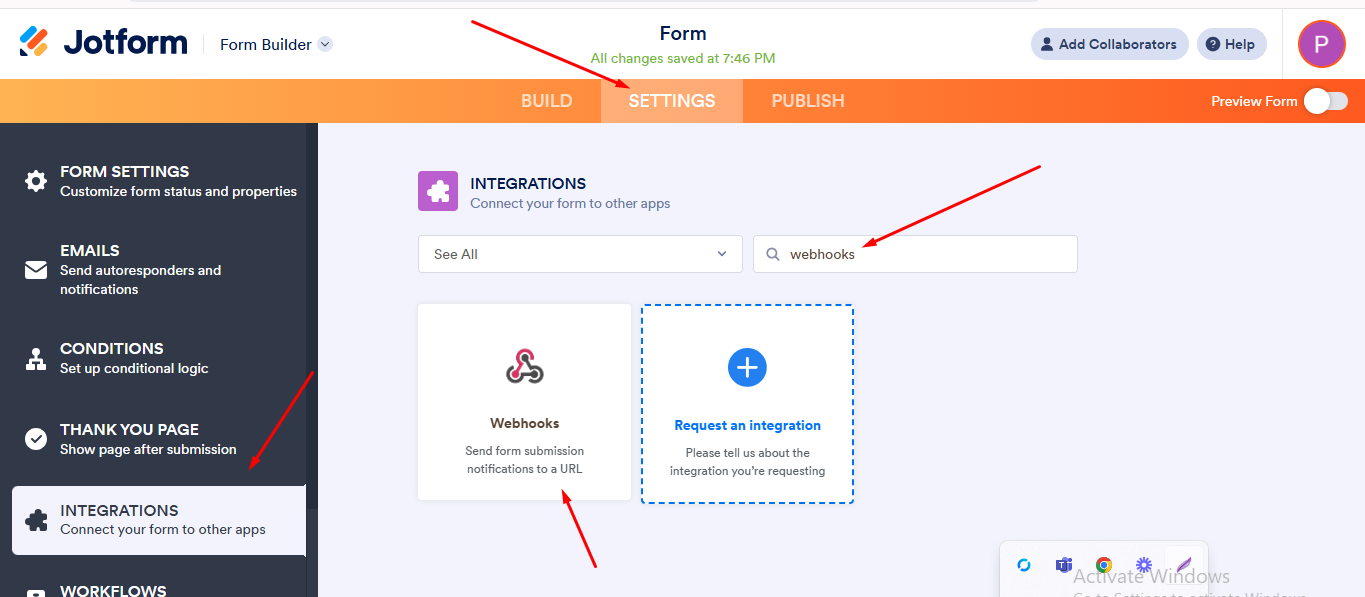
Step-b: Add the Webhook URL (for example, https://your-site-name/wp-json/jotformfree/v1/webhook ), which is available in the plugin’s “Connect with JotForm” tab, and then click Complete Integration.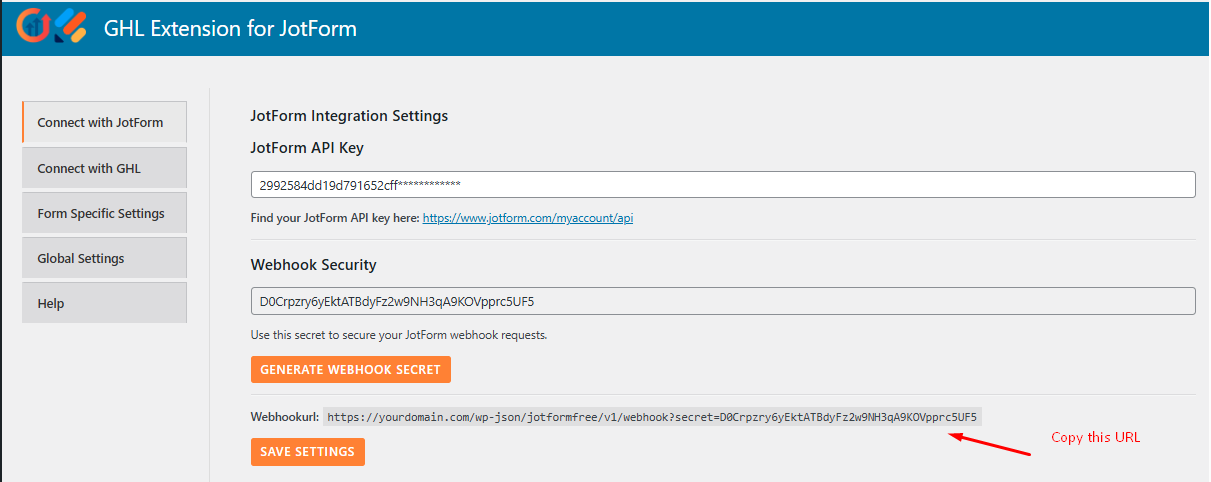

With the above setup, your form is ready to send data to GHL after submission. However, before that, you need to map the form fields with the GHL fields.
Step-1: To do this, go to the Form Specific tab and select the specific form whose field values you want to send to the GHL CRM: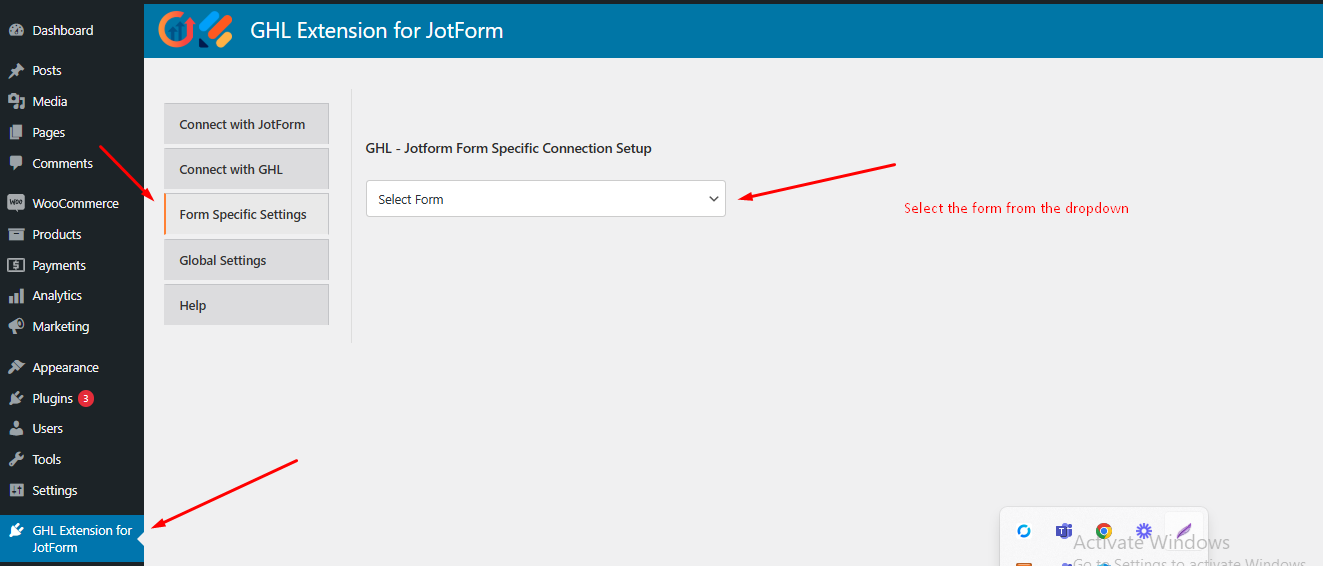
Step-2: Map the GHL defined fields with the corresponding form fields.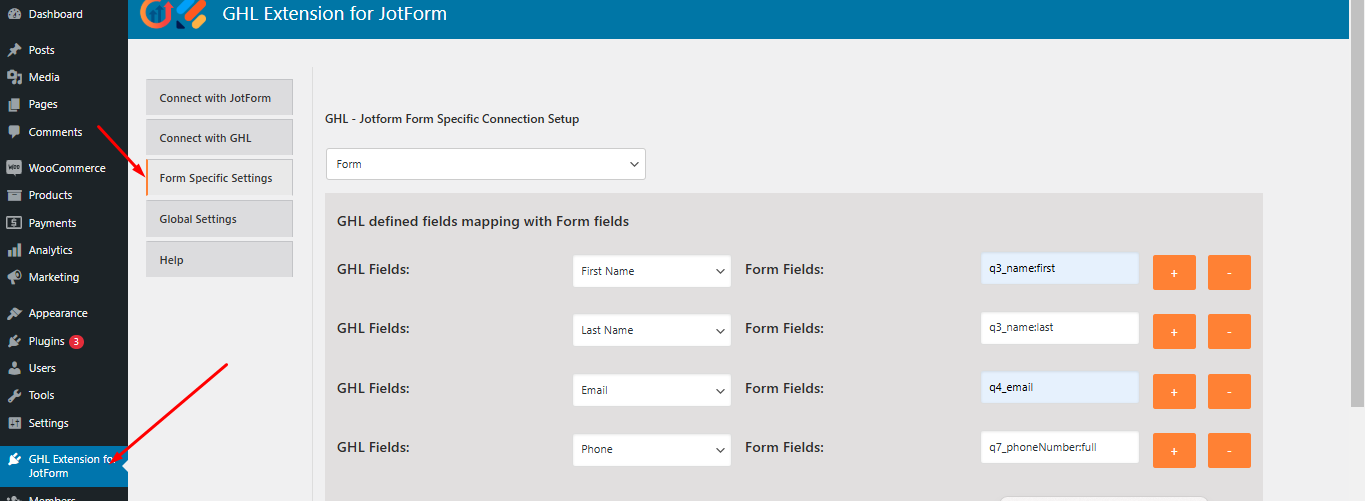
Note: To retrieve the form field values, go to the JotForm dashboard and select the same form you mapped on the plugin page. Navigate to the Form Build section in JotForm, select the fields, and then go to Advanced > Field Details.
For example, insert the field values in the following format: q{input_id}_uniquename:otherparts (if any).
1) For Name Form Fields: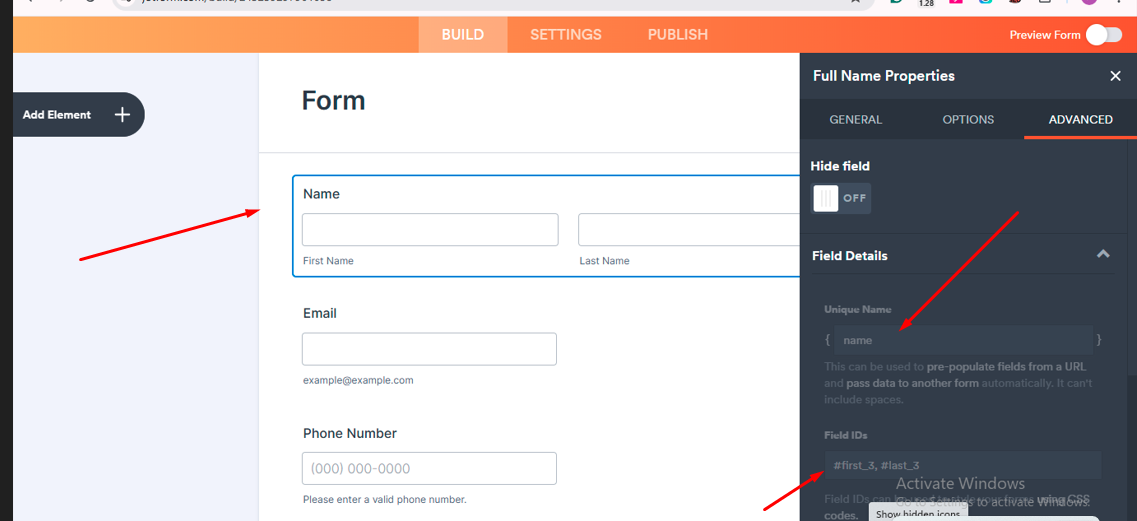
2) For Email Form Fields: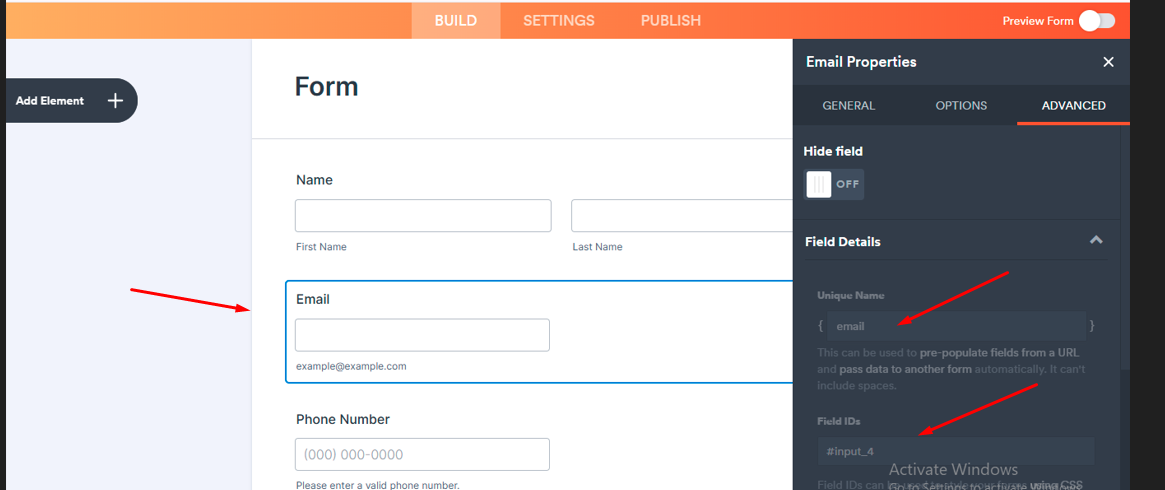
3) For Phone Number Form Fields: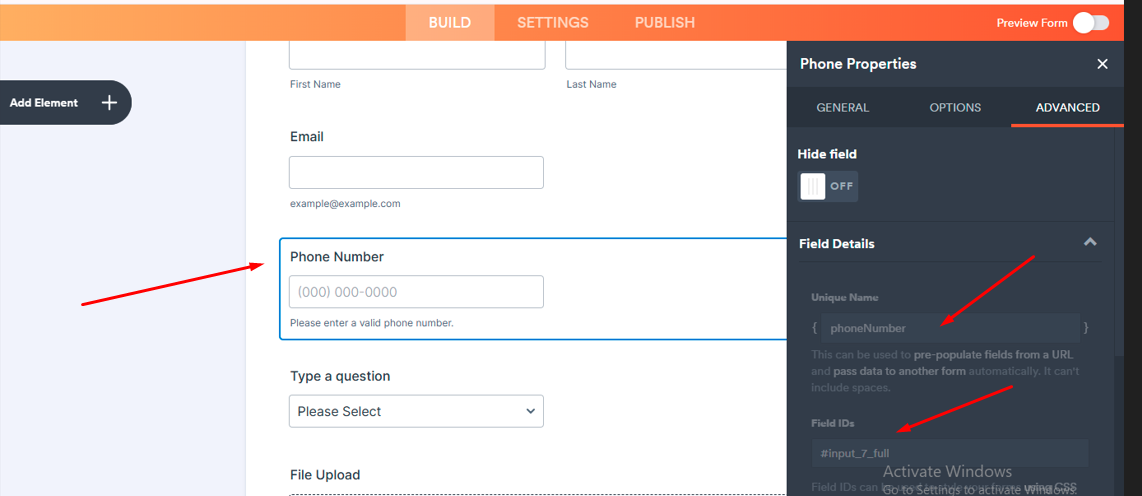
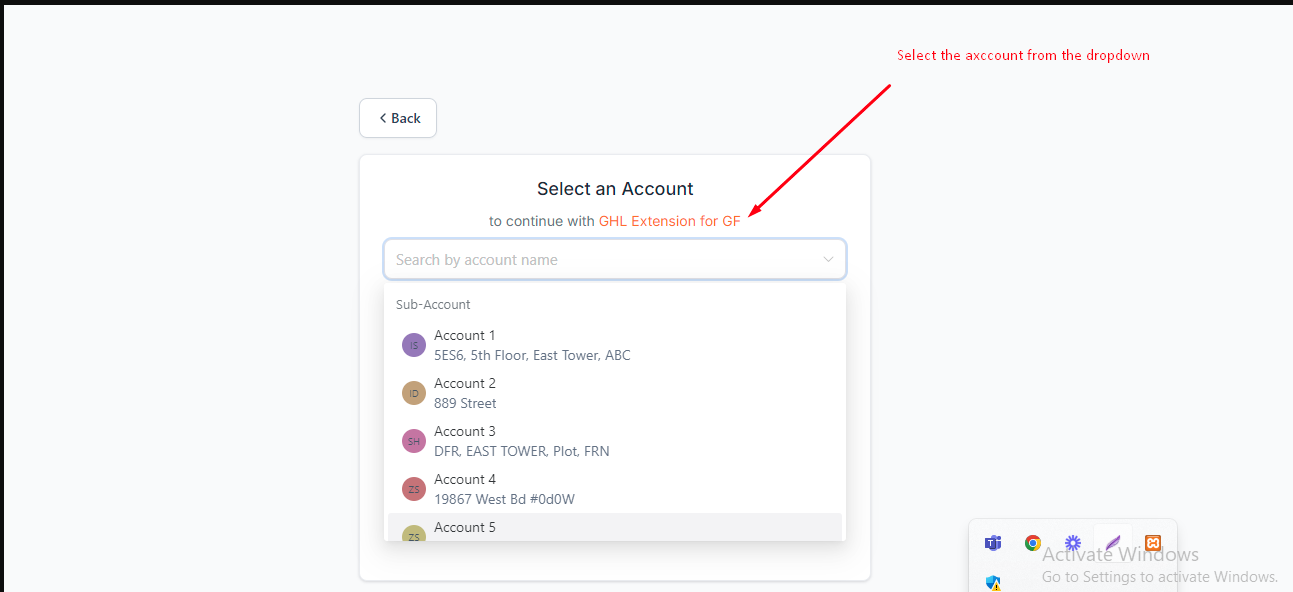
Step-3: If you want to connect this specific form to a different GHL subaccount, click the Select GHL Subaccount dropdown and choose the subaccount where you want to send the leads. Then, save the settings. This ensures that the form's leads are sent to the selected GHL subaccount. If no subaccount is selected, the form will remain connected to the globally connected GHL subaccount (if any), and the leads will be sent there.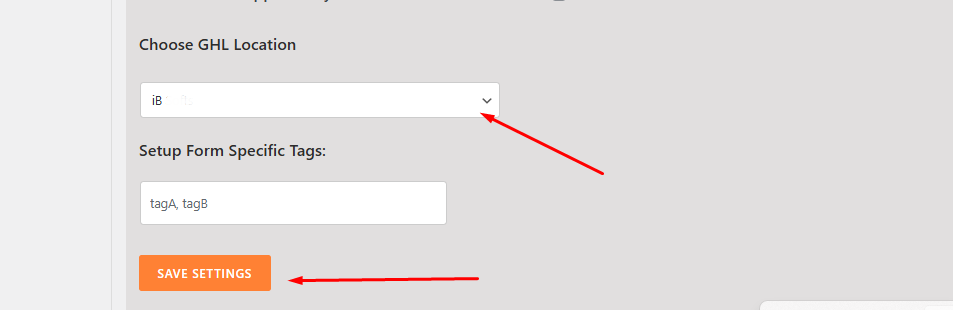
Note: If you want to connect to a different location, click the Disconnect From GHL button. This will disconnect the current connection, allowing you to connect to another location.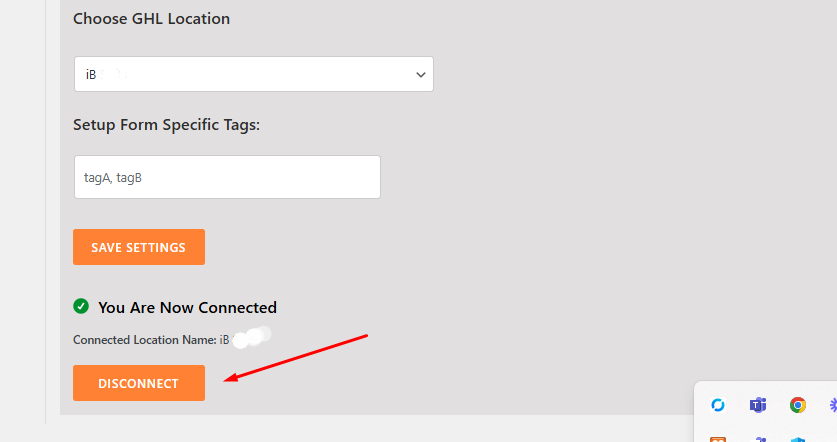
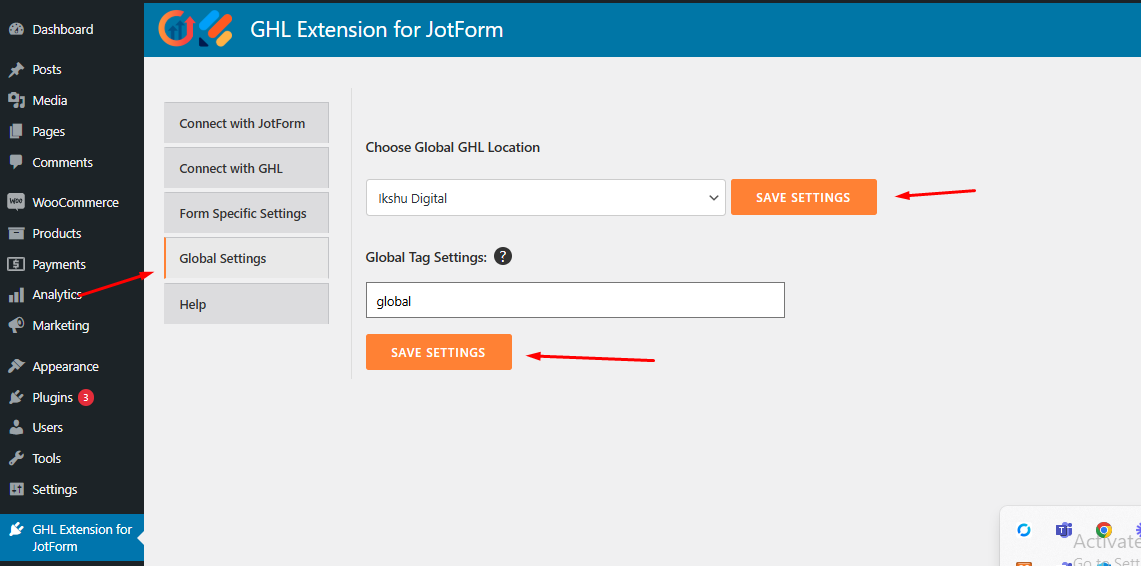
Global Settings:
Step-a: One can also set the Global Location and Global Tags from the Global Settings tab. To do this, select the connected location from the dropdown menu and specify global tags. These global tags will be used when no form-specific tags are available.
Step-4: If you encounter any difficulties configuring the settings, you can visit the Help section or refer to the documentation.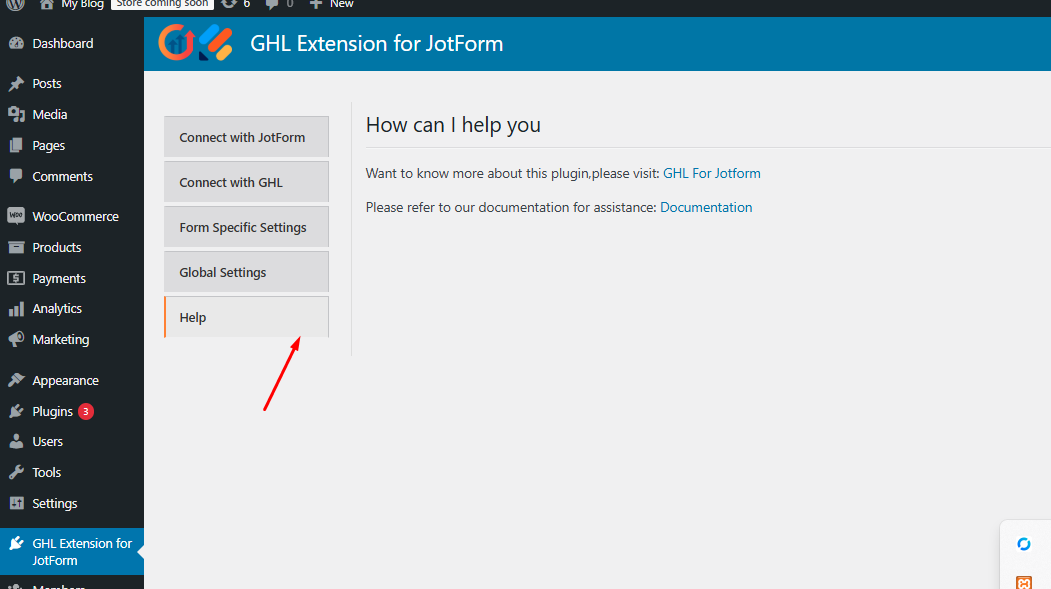
Here are the screenshots of the leads that were submitted:
Form:
CRM Leads: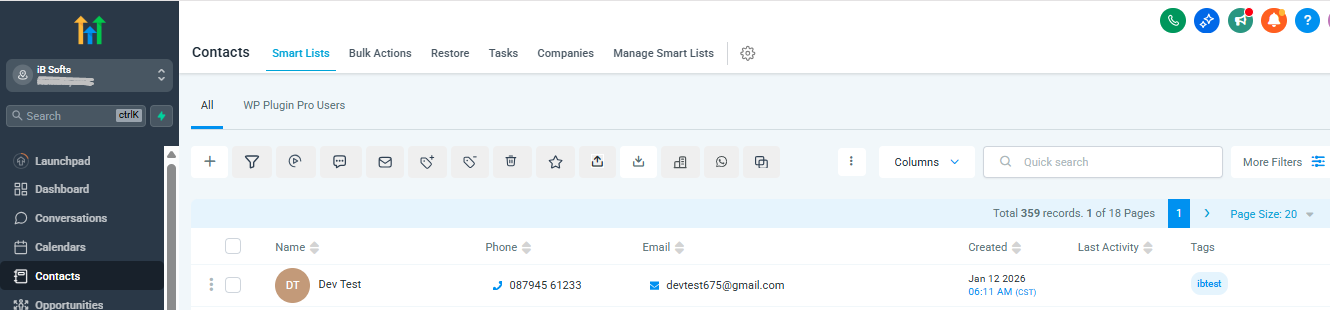
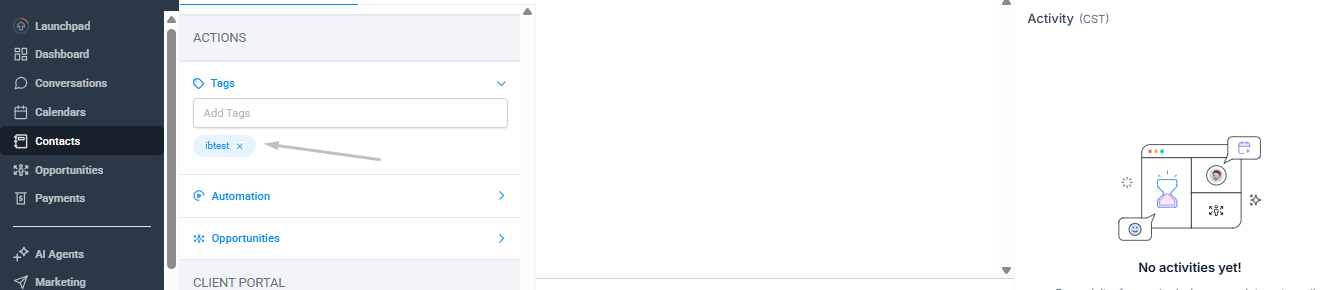
Tags: